What Is the Smallest Size for an Ensuite Bathroom?
Adding an ensuite bathroom is one of the most rewarding home improvements you can make, especially for homeowners, renovators, and anyone planning to maximize space or increase...
A well-planned ensuite bathroom renovation can feel like the best upgrade you make upstairs. It gives you a private bathroom, creates more personal space, and reduces pressure on the shared bathroom and the family bathroom, especially on a busy day. The tricky part is not the idea; it is working out how long the project really takes and how to avoid the kind of delays that drag on for weeks.
Most ensuite projects follow a reliable order, but timelines vary depending on your available space, the condition of the existing bathroom, and how much you are changing. If you keep the layout close to existing plumbing routes, you can usually reduce disruption to your house and keep the schedule predictable. This guide breaks down the stages from planning to completion, so you can take stock early and avoid the common time traps.

For a straightforward upstairs ensuite bathroom refit, many homeowners see on-site work take roughly one to three weeks. This usually applies when the toilet, basin, and shower stay in a similar place, and your key items are in stock. If you are creating a brand new en suite bathroom from a bedroom corner, moving waste routes, or changing the floors, it typically takes longer.
The overall timeline also includes pre-build time. Planning, ordering suites, and waiting for deliveries can add extra weeks before anyone starts to install anything. If you want less disruption, treat ordering and lead times as part of the real schedule.
Careful planning is the fastest way to reduce delays later. Measure the room, check the shape, note any awkward corner angles, and assess how you will move through the middle of the space. In a small ensuite, these details matter because a few centimetres can change how usable the bathroom feels.
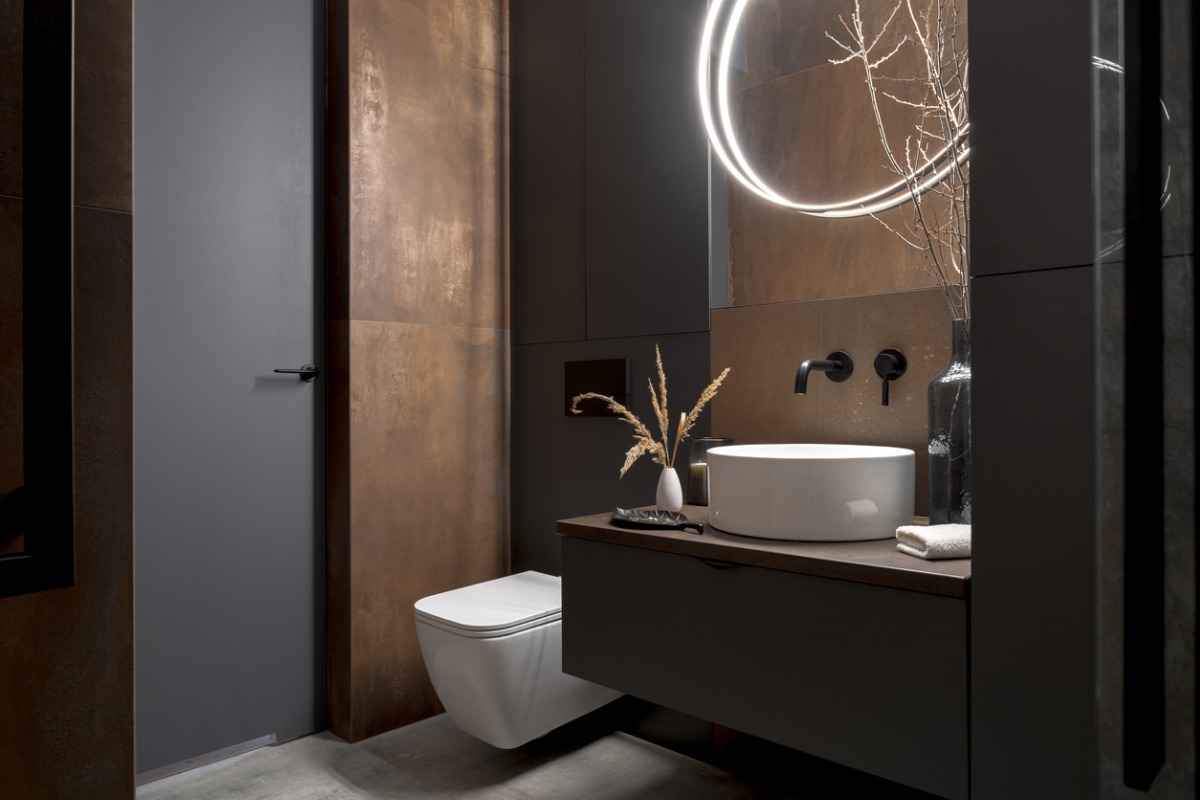
This is also the moment to decide what you want from the ensuite. If you want a simple, functional space for quick mornings, you can prioritise shower access and easy cleaning. If you want a personal oasis for self care after a long day, you might prioritise lighting, finishes, and comfort features.
Layout choices affect both build time and daily comfort. The simplest layouts often place fixtures along one wall, keeping more floor space clear, which is helpful in a small room. A corner shower layout can also be a smart, space-saving approach if the room shape is awkward.
At this stage, it helps to create a basic plan for the shower zone, the toilet position, and basin placement. You want enough space to stand, dry off, and move without bumping into the sink or shower door. A practical layout tends to install faster because there are fewer surprises during fitting.
Most internal upstairs ensuite renovations do not need planning permission, but it can apply in specific circumstances. If you are changing a window, altering the exterior, or working on a listed property, it is sensible to check early. If you are unsure, a quick conversation with the local council can save you major disruption later.
Even without planning permission, building standards still matter for electrics, ventilation, and safe installation. Good planning here protects your timeline because it reduces the chance of late-stage changes. It also helps you keep the project calm and controlled.
Missing items, not slow workmanship, often cause delays. Before you book your install date, check that your core items are in stock, including the shower enclosure, tray, toilet, basin, tiles, taps, and lighting. If one key part is delayed, the whole bathroom can sit unfinished.
It helps to choose a range where replacements are available. If a particular suite is out of stock, you want a backup that suits the same wall connections and dimensions. Taking stock of lead times early is one of the best ways to avoid downtime.
Prep work is about containment. Floors on the access route are protected, doorways may be sealed, and the work zone is defined so that dust does not spread through the house. If the ensuite is being created from part of a bedroom, move the bed, soft furnishings, and anything you want to keep dust-free.
Good prep also makes daily life easier. Even if the family bathroom stays available, the upstairs routine can change during the build. Planning your morning flow helps the project feel less disruptive.
Strip-out means removing existing fittings, tiles, and, in some cases, sections of flooring when plumbing is being changed. In a simple ensuite bathroom refresh, this stage can be quick, but older bathrooms sometimes reveal hidden problems behind the wall. Damp patches, weak sealing, or messy pipework can add time.
This is also when the room becomes noisy and dusty. Most disruption happens early, so it helps to schedule this stage when the household can cope. Once the strip-out is done, progress tends to feel steadier.
The first fix is when pipework and waste routes are set before walls and floors are closed. If you keep the toilet and shower close to existing routes, this stage is often faster and less invasive. If the layout changes significantly, the installers may need to lift more floors or box in more pipe runs along a wall.
In a small ensuite, plumbing can take longer simply because there is less room to work. This is where practical layout choices protect your timeline. A good plan keeps plumbing routes sensible and reduces rework.
Floors matter because they affect drainage, comfort, and access. If you are installing a shower tray, the base and levels must be correct to ensure water flows properly. Poor floor prep can cause leaks, movement, or sealant failures, which can slow the project and create bigger problems later.
Changing floor levels can also affect thresholds into the bedroom. That can make the room feel less “complete” if it is not handled neatly. A well-installed floor finish supports both function and the modern look most homeowners want.
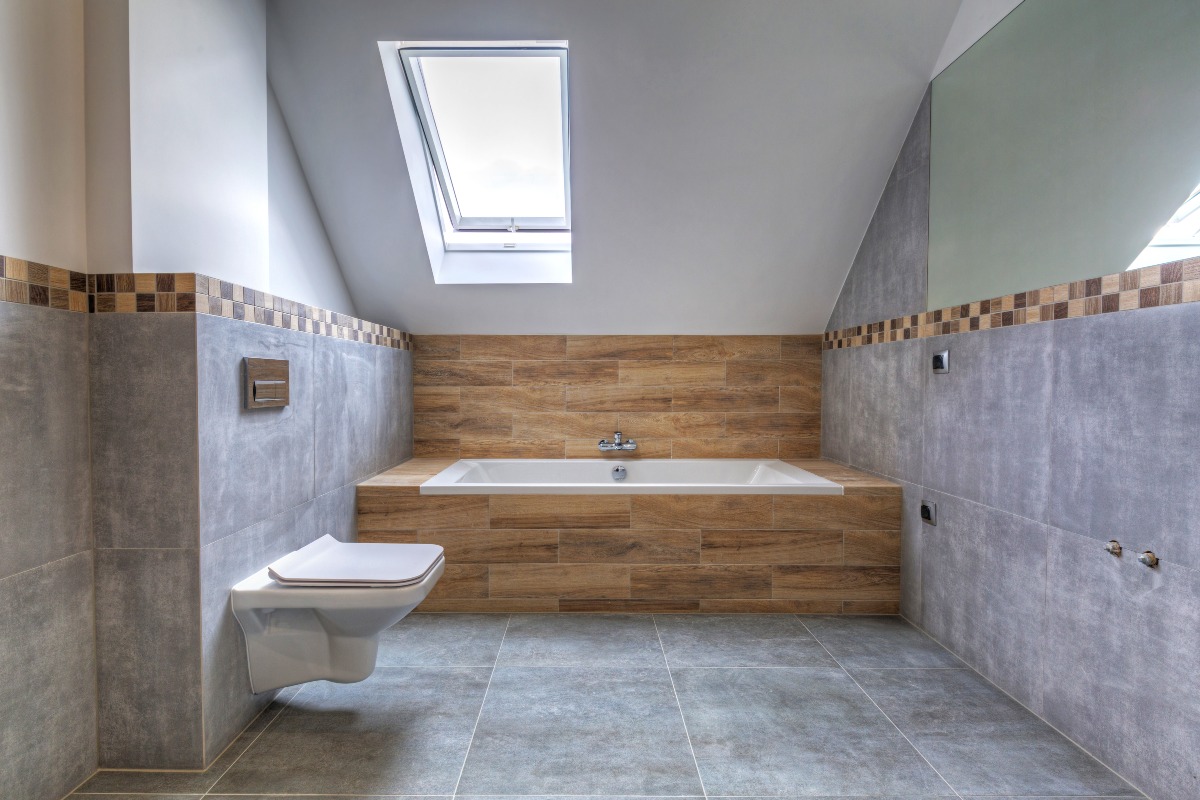
Ventilation is essential in any bathroom, but even more so in an upstairs ensuite next to a bedroom. Steam from the shower needs a reliable route out; otherwise, the bathroom stays damp, and the bedroom can feel stale. If the space is naturally dark, moisture issues can feel worse because drying is slower.
Ventilation planning can also affect the build time. Duct routes, fan placement, and wiring need to be decided before walls are closed. A good ventilation plan makes the space more comfortable and protects your décor and finishes long-term.
Electrical work often happens before walls are finished, so cables can be run safely and neatly. A strong lighting plan makes a small ensuite feel bigger and more practical. Most homeowners do best with layered lighting: overhead light for the room, and more targeted lighting near the basin.
If you want illuminated mirrors, plan them early so the wiring and wall position suit the mirror and basin height. This can be a simple feature that adds a luxury feel without taking up space. It also makes morning routines easier and more convenient.

Before tiling, walls need to be sound, flat, and suitable for wet areas. Waterproofing behind tiles is especially important around the shower, whether you use a shower cubicle or a shower enclosure. Rushing this stage is one of the most common reasons bathrooms fail later.
Some steps need curing time. That may seem slow, but it prevents water from seeping behind the wall and causing damage. A durable base keeps the bathroom stylish and functional for years.
Tiling is where the ensuite starts to look like a finished room, but it is not always fast. Cutting tiles, setting them evenly, and allowing time for adhesive and grout to dry can take longer than people expect. In a small room, tiling can be slower because every cut is visible and space is tight.
This stage is also where stock issues can bite. If you run short on tiles, matching batches later can be difficult. Ordering enough, plus spare tiles to keep in stock for future repairs, is a practical move.
Once the surfaces are finished, the shower is installed and sealed. A shower enclosure often keeps the rest of the bathroom drier, making the room feel more practical for daily use. A shower cubicle can be a neat option when space is tight, and you want a contained setup.
Door style matters in a small ensuite. A door that swings into the middle can steal usable space and reduce access. A well-chosen enclosure keeps the layout functional and reduces splash, making cleaning easier.
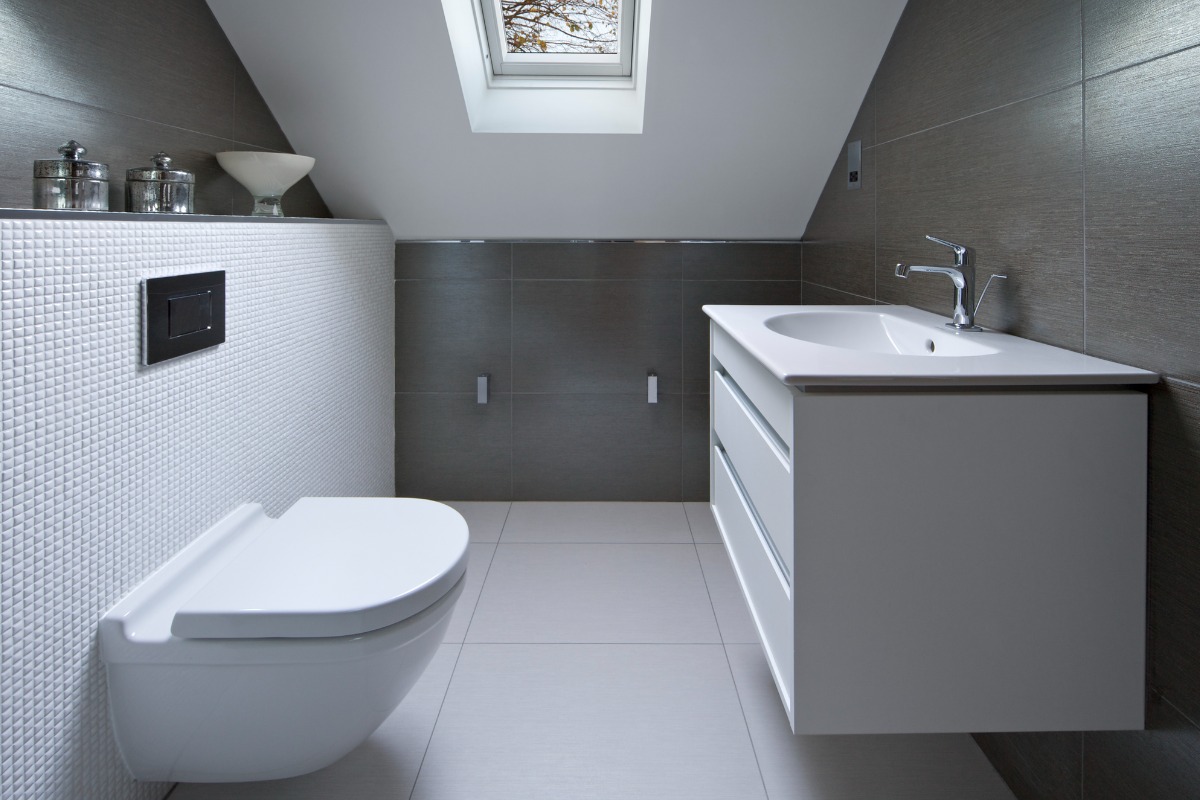
Toilet and basin fitting is usually satisfying because the room starts to feel “real” again. A short projection toilet can be helpful in a small ensuite because it preserves floor space and improves movement. If you want a stylish toilet, comfort and clearance are just as important as design.
Wall-hung fixtures can make the room feel lighter and more modern, and they make cleaning floors easier. They do require correct support and planning inside the wall. When done properly, wall-hung options can help a small bathroom feel more open and complete.
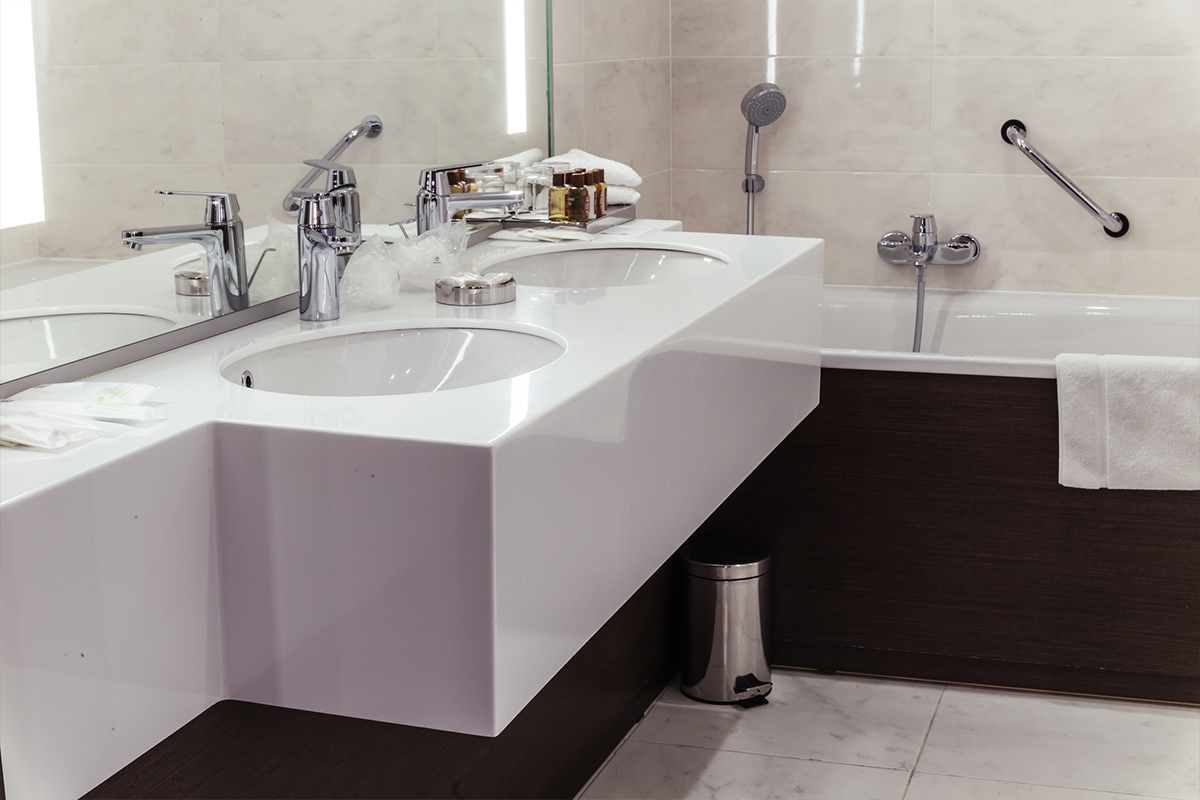
Storage is often underestimated in ensuite bathrooms. Without it, countertops fill up, and the room feels smaller. A slim unit or minimal furniture can still provide enough storage to keep the space tidy and practical.
Accessories should be chosen carefully. Too many accessories can overwhelm a small room, while a few smart pieces can make it feel stylish and finished. This is where the ensuite starts to feel like personal space rather than a rushed add-on.
The final stage is checking the details. The shower is tested, the toilet is checked for proper flushing, the basin is checked for leaks, and seals are inspected around the tray and wet zones. Ventilation and lighting should also be tested to make sure the room works as intended.
Snagging is what makes the job truly complete. It is better to spend time here than to rush and deal with issues later. Keeping spare tiles and key parts in stock can also be helpful if you ever need repairs.

The biggest delays usually come from two things: stock and surprises. Late deliveries for suites, tiles, or the shower enclosure can halt progress, and hidden issues behind walls can expand the job. Older properties sometimes reveal patchy waterproofing, outdated pipe routing, or floor issues that require repair.
You can reduce delays by confirming stock before booking trades, keeping the layout practical, and choosing a range with backup options. Careful planning does not eliminate every surprise, but it prevents most avoidable ones. It also reduces disruption and keeps the project manageable.
A good ensuite bathroom adds real benefits. It creates a private bathroom that makes mornings easier, gives you your own space, and reduces pressure on the shared bathroom. If your master bedroom gains an en suite bathroom, it can also make the house feel more modern and more convenient.
It can also add value, especially in homes where a single-family bathroom is handling all the work. The key is quality and layout. A functional ensuite that is well ventilated, well lit, and easy to use will always feel like the better investment.
So, how long does an ensuite renovation take from start to finish? The on-site work is often one to three weeks, but the full timeline includes planning, ordering, and making sure key items are in stock. The best results come from careful planning, practical layout choices, and keeping the shower, toilet, and basin positions sensible.
If you want the smoothest process, keep the plan simple, confirm stock early, and build in time for snagging. Done properly, your ensuite becomes more than a renovation. It becomes a private bathroom that supports convenience, comfort, and a calmer routine every day.

Are you ready to take the plunge and transform your bathroom into an oasis? Well, look no further! The Conversion Guy is committed to providing you with an unparalleled bathroom renovation experience.
With over 40 years of experience in bathroom remodelling, we are looking forward to helping you create the most amazing bathroom of your dreams! We love talking bathrooms, so be sure to get in touch today or book a free consultation and start your journey towards creating the perfect bathroom retreat!
Explore our resources and learn about pricing, bathroom refits, kitchen kitchen renovations, loft conversions and many other home improvements in our Learning Centre